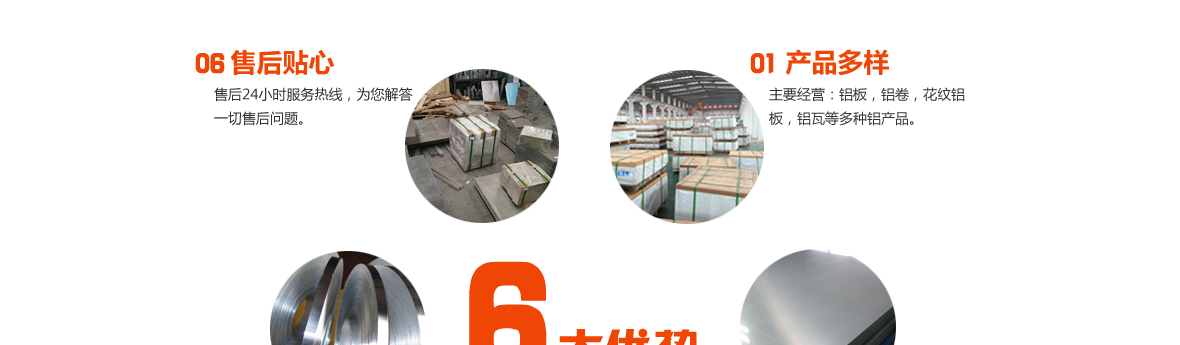
Home     Hi, My name is Amber     Workshops     Press     Contact     Sponsor     Tutorials     Resources

Saturday, January 28, 2012

Colour co-ordinate your wardrobe


Many of my regular readers will know about my fashion pact to only buy clothes in my favourite colours of red, blue and white. (Ok, black gets a look in too, but only rarely)  I started this about 2 years ago, and my wardrobe and style has been completely transformed by this one simple trick.  I thought you might like to see it!

Do you know I can co-ordinate an outfit in less than a minute?  Seriously. 

Shoes. Tick
Dress. Tick
Jewellery. Tick

Because my clothing haul is all in shades and tones of those three colours, co-ordination is no longer a problem. It is a cinch. 

Shoes too.
It makes shopping a breeze.

I can look at my wardrobe to see what basic pieces I need to supplement my outfits.  Whether it is a plain coloured jacket or cardigan, a denim skirt, a top to go with my jeans, a belt to cinch my waist on a dress or a fabulous earring, all I need to do is to take a general look to see what is missing. 

Makes treasure hunting really simple too.  Gives you a goal when entering the cavernous op shop jungles. 

Right now, I'm searching for a pair of simple red ballet flats. 


Talking of shoes, I can't resist showing you my most fabulous op-shop find of late. These wedges were hiding in the dress up clothes.  Can you believe it? 


And here's another secret...They are originally from Kmart!!!  

Who cares?  To me, they are Dorothy shoes. 
Just magical. 

Friday, January 27, 2012

Adolescence by Friday's Guest, Felicity St John


Adolescence
Witnessing the Wave of Emotion
By Friday's Guest, Felicity St John. 

If you have an adolescent in your home, perhaps you are familiar with the bouncing emotionality that can often come with this period.  It’s hard to remember not to jump on the emotional rollercoaster with them, and instead be there as an empathic, present, authentic witness to their life.  I had my daughter at 18 and the age gap seemed almost non-existent.  I was the one who didn’t fear her adolescent years as we were so close, and she was mellow, people pleasing, into school and loved sport.  I totally underestimated the force of hormones, and a large move, and hence I experienced adolescence as something akin to a thermo-nuclear meltdown.

I think the culture often sets us up to fail with adolescents; we tell them to grow up way too fast, then tell them they can’t do things as they are a child, we infantalise them, externalise their learning and often responsibility, sometimes they look so big we let them go into situations too deep for them, we don’t pay enough attention to the role of meaning at this age, we have no decent initiation into adulthood, and we are blurry about both where the child ends and the adult starts, and where the child ceases and the mother begins. I still think the culture predominantly sees your teenager as a “product” of your parenting, despite them being very much their own person.

I think mothers often base their feelings of wellbeing on how things are going on the home front or for someone else. I think our ability to throw ourselves into this is often culturally prized too; we get raised to be other focused.What if our teenagers are really grieving, struggling, tormented, depressed and even getting into strife - how far do we identify (or over-identify) with their pain? How much should our joy and sense of peace rely on another person’s happiness?

I really resisted the changes I saw in my daughter; the ones I deemed negative.I didn’t want her to feel the immense pain she seemed so stuck in. What I eventually realised was my craving for her to be happy and together was another burden for her. I had to grieve, accept and stop resisting (and repeat this daily).

I have also discovered that when I used where she was at, as the barometer of how I felt or should feel, I was miserable...continually, or at the very least constantly possessed a grey-wash over my life. And sometimes I literally pulled my hair out (it’s funny now).  I later realised this greyness didn’t actually make anything better for her, rather it diminished my resources as a parent to my two girls. We are taught worry is a badge of motherhood, but when it doesn’t help, do we actually need to wear it? Is there an alternative? I propose there is and it involves centring yourself and not being the wave of emotion, rather witnessing it with compassion for the other and self.

Molly from the blog ‘First the Egg’ talks about parenting as being like a midwife is with a birthing woman and ‘holding the space’ for them. Molly articulates; ‘the basic idea is that a calm, focused, loving person can protect a space in which the laboring/birthing person can do what she needs to do…and sets aside his or her own baggage in order to be in the moment to protect and honor that person’s present experience.’

Carrie from "The Parenting Passageway" describes this as being the Queen; one who has ‘a kind way’, ‘a Queenly way’, who acts ‘as a wall a child can bounce off’, ‘who can model being calm, solving the problem, being respectful’, and who can ‘hold the balance when your child cannot’. I desire to be this, yet I also struggle with it, particularly when faced with barbs from someone who physically looks like an adult, possesses adult language and has had 16 years commando training in your weak spots. Yet I recognize as Coloroso (quoted by Carrie) does ‘we can’t keep hooking in to our kids’ adrenaline’.

I hadn’t been holding the space for this beautiful young person, I’d been hitching onto the adrenaline and emotionally crashing with exhaustion. It wasn’t working and I didn’t want to be bald.

When things get dramatic it’s easy to focus on the drama- we forget we can shift our attention from the drama to our resources and the young person’s strengths. I came to understand that my daughter was gaining great qualities and many of these strengths were ones I had dreamed of for her when she was younger. They just looked a little different. It often helps to think ahead of the person you are assisting them to become, and not just making it through what you want for that day – or I might add what another person/institution/agency wants for that day. The baby I had held in my arms was growing stronger, extending her reach, finding the voice (hard to do when you were always a mouse), challenging her own understanding, organising others, and standing up for what she believed to be right even when this cost her greatly. She was often compassionate, regularly offered spontaneous loving gestures, still loved to be hugged, spent time with me, included me in her life and the lives of her friends and she even tucked us into bed each night (she stays up a lot later). Our relationship would never return to earlier years, and it was never meant to. It, like us as individuals, was meant to transition...always.


As a mother of a teenager myself, this article by Felicity is a wonderful reminder that we are two separate people, with our own goals, hopes, dreams and ways of seeing the world. Helps to remember this when they are having a tantrum!

Thank You, Felicity. Once more, your wisdom is beautiful.

THOUGHTS??? 

Thursday, January 26, 2012

Dutch Pancakes "Poffertjes"


Santa brought Ned this Dutch Pancake maker for Christmas.
It was the best $12 he ever spent... um, er, invested...

For the past week, Ned and his dad have eaten baby pancakes for breakfast.  (Ok. Sometimes Mummy had a little taste too...)  Covered in lashings of real maple syrup (no maple flavoured syrup here) and a little dusting of icing sugar just like the real thing. Add a toothpick or two, and you could even been in Europe. Or at least Tamborine Mountain at the market... 

Is your mouth watering? Want to make some too? 


Here is the recipe we use:

1.  Heat up the poffertjes pan until it is very hot.  Use a pastry brush to gently coat the pan with a brushing of olive oil.   
2. Add 1 cup self raising flour, a cup of caster (super fine) sugar and a pinch of salt into a big bowl.  Give it a loving stir. 
3.  Add 1/2 cup milk and 1/4 cup water to the flour. Pour into your thermomix or use an electric beater to combine it into a smooth paste.
4.  Add 3 eggs, one at a time and give it another whirl until it is smooth and glossy like wet paint. 
5.  Add the mixture to the pan. Do not overfill the holes.  Cook for a few minutes until they bubble and brown, then turn them over, one by one. 
6.  Serve whilst steaming!  Makes a wonderful dessert too. Simply add a sprinkle of milo and icecream.


Caught in the act.  :) 

Wednesday, January 25, 2012

Obliteration Room, Yayoi Kusama Exhibition GOMA

Wednesday Wonderfuls

Last week, Ned and I headed up to Brisbane for a day of artistic pursuit. My artistic pursuit really, but he wasn't to know!  We made straight for GOMA and the We Miss You, Magic Land exhibit. But at the top of the stairs, the spotty dotty room grabbed our attention first.

Yayoi Kusuma's work, The Obliteration Room, is an all-white room transformed by the love of dots. Big ones, small ones, teeny tiny ones.  Ned took his sheet of dot stickers and jumped straight in... to the couch.


Young and old, happy and sad, tall and short- all kinds of people were drawn in and mesmerised.  As you can see. Sticky dot heaven.  If I come back in another life, I'd like my life to be this technicolour. 
Actually, thinking about it, this exhibit kind of reminds me of this life.  We all begin with a white room, and our experiences and adventures and traumas and thoughts and the people we meet and the music we hear and the books we read are our dots.  Some people or things or words make a big impression, others a small one.  But they all impress and soon we are like this dotty room.  Technicolour!  

I suppose some things that happen in life might appear as black dots really but you know what, in this exhibit colour rules. Bright, happy, sunny colours.  Why not take your black dots of life and colour them in too?   It is only thinking that makes them so. Revise old hurts and wounds and take charge of them once and for all. 

When we finally made it out (alive) from the dotty goodness, making sure that no dots escaped with us on our shoes, we traipsed down the stairs to Magic Land. I miss Magic Land. Do you? 


This bubbly fizz of an art installation tickled my fancy and tugged at my heartstrings.  I couldn't resist the magical toadstools, fairy lights and popsicle trees made from sugar, glitter, modelling clay and mirrors.  This is the fairy land of my childhood, the land at the top of the Faraway Tree.  


An interactive video game allowed Ned and I to make our own Magic Land and email it to ourselves back home. 
"We Miss You, Magic Land" is on at GOMA in the heart of Brisbane City until the 4th March. If you haven't yet been, it's a lovely child-friendly day out. 


Watch out for the giant rainbow though!  This eye-catching piece sits on the top floor. Ned ran to it and went straight through. 

What a brilliant photo opportunity, only you are not allowed.  Mmmm...  A tiny sign sitting on the floor reads 'Keep Off the Exhibit'.  Sadly, Ned can't read and I didn't see it.  An abrupt reprimand from one of the GOMA guards sent us scurrying.  Truly, I just can't believe that the artist who made this could ever be so precious.  Surely not. 

Here's the equation. A lifesize rainbow with a hole just right for climbing under + children or young-at-heart adults = an irresistible temptation! 

Tuesday, January 24, 2012

Giveaway winner: Chicken and Egg by Christina Lane


The winner of the Chicken and Egg by Christina Lane giveaway is...

"Mademoiselle Slimalicious" 

Congratulations, Cyndie. 

Valentine Tea cup tags

I'm a BIG fan of secret love notes, and not-so-secret love notes too. I love treasure hunts, and scribed messages hidden in lunchboxes and briefcases and I adore livening up our daily moments with simple fancies too.  Valentine's Day is coming up. 
Why not make your love well-known with a Valentine teacup tag too?

I saw this 'wreath' pattern idea in one of my Japanese crafting books. I thought the wreath idea would go perfectly with my Valentine tag. 
 I already had a little 'leaf' handcarved stamp that I use in many projects.  I'll show you how. 

Firstly, use a punch to cut out a paper tag. (Any shape you have will do)

Draw a little teardrop shape on a piece of rubber eraser. 

Use a speedball tool to carve a channel around the outline of the teardrop shape. 

Run the tip of a carving blade (from any good stationery or scrapbooking shop) in the channel to loosen up the rubber.  Slice a layer of rubber about 3mm thick from the rubber around the shape. 
Press your stamp into ink and make an impression on a bit of scrap paper. Slice away any rubber that is impacting upon your design. (You'll see this on your design as the ink will highlight it)

Once your shape is perfected, trim the sides of the rubber. 

Dip your stamp in green ink and press down around the outside edge of your paper template. 

Add your message. 
A note of love, or a quote.
I love quote books and am forever scanning them for things that delight me. 

Thread a needle with baker's twine and push the needle through the paper tag.
Tie it onto the cup. 


Teacup Love. 

Monday, January 23, 2012

Quick and Easy Lunchbox Ideas: Parent Tip


As we all prepare for school to begin, the one thing that frightens many of us is the task of filling the school lunch boxes again.  To ensure our children are not subjected to the horrors of soggy vegemite and fake cheese sandwiches, squashed bananas and warm juices from our yesteryear.  Disgusting. Double yuck.

These days, at least our children's lunch boxes have ice packs and thermal jackets. Some children are able to store their midday meals in fridges in their school rooms.  Times have changed. Thank goodness.

But the one thing that hasn't changed is the morning rush. In fact, with so many mums now working in some form or another, the morning rush has sped up and packing a lunch box might as well be up there with scaling Everest.  Almost impossible.  Not totally impossible but just out of reach.

My tip is to invest in reusable baby food containers. I have ones from tupperware that I've had for years and they are used every single day so the investment has been well worth it but any kind will do.  At the very least, a pack of those baby zip-lock bags will suffice.  And for a lunchbox that will last you years, invest in a stainless steel camping tin . For less than $30, the children will have a lunch tin to be proud of that will do them the run of primary school. 

But I find the one thing that helps me above all is to have a comprehensive list on my fridge.  It's a mash up of every lunch box possibility.  It includes things that I can grab from the cupboard, the freezer, the fridge and the fruit bowl. Mostly, it is things that don't require any thought other than to buy them from the shops but also includes yummy concoctions that can be made in advance in less than 20 minutes and can doled out all week (unless eaten by those with rogue hungry bellies at 4pm).
I thought you might like to make a list too so I've started you off by giving you mine.


LUNCHBOX LOVE: A MAMAMOONTIME LIST OF GOODIES FOR CHILDREN.
  • Fruit salad on a stick. Fill a skewer with apple slices, hulled strawberries, pineapple chunks, nashi fruit, orange quarters and green grapes. Or if not on a stick, in a small container with separate compartments to help keep fruit fresh and juicy. 
  • Plain greek yogurt with a drizzle of honey and blueberries rolled in. 
  • Dehydrated fruit roll-ups (Visit the Fruit Leather vendor at Tamborine Markets in the Gold Coast Hinterland for some really yummy concoctions or borrow a dehydrator one weekend and make your own)   
  • Fruit (banana or carrot) or savory muffins. Low in sugar but oh so good. I LOVE muffins. I make up a batch of 24 and freeze them individually.  Just throw one in the lunchbox frozen and they'll be perfectly soft by morning tea. 
  • Date slice is my mum's staple recipe for gatherings.  
  • Your own premixed dried fruit and nut parcels. Simply grab an airtight container and throw in 2 cups of sultanas, 1/2 cup sunflower seeds, 1 cup of dates, 1 cup of cashews, 1 cup of sliced almonds, 1 cup of apricots, 1/2 cup sesame seeds, 1/2 cup dried mango (chopped finely) and 1/2 cup shredded coconut.  (Replace nuts with pepitas and chopped dried apple if you have a peanut-free school) Store in fridge.  Each morning, fill a tupperware baby cup or a ziplock bag with a scoop of this good energy boost.  
  • Date coconuts or carob coconut balls found in most good health food shops. (Wrays at Palm Beach stocks both)
  • Dehydrated banana sticks. Real banana dried.  It looks like shrivelled up fingers but tastes great.
  • Scones and jam
  • Pikelets (mini pancakes), either store bought or homemade slathered with butter or sunflower seed butter (free-nut butter) 
  • Sushi- fun to make with the kids the night before.  For fillings, try tuna and kewpie mayonnaise, zucchini and carrot, egg omelette or home-made fish fingers and lettuce. Yum. 
  • Cherry tomatoes, slices of zucchini, fresh corn on the cob (so sweet) and slices of cheese or ham
  • Loose walnuts or macadamia nuts, sunflower seeds or figs. 
  • Roasted broadbeans or chickpeas, found in ready-made packs in the health food aisle of Woolworths and possibly Coles
  • Try a salad in a jar.  Add beetroot, baby corn, lettuce, tomato slices, asparagus, carrot chunks, snow peas and butter beans with a salad dressing foundation.  Children just need to shake it up and eat it.  Remember to pop a fork in their box. 
  • Yoghurts
  • Big slices of watermelon, rockmelon (cantaloupe) or honeydew 
  • Slices of capsicum in all colours are great for dipping into cream cheese or tzatziki 
  • Cheese straws, either home baked or store bought 
  • home made pasta salad or rice salad can be made for dinner on a Sunday night and dished out for a Monday lunch treat
  • Celery sticks filled with cream cheese or peanut butter, with sultanas along the top
  • Freshly popped popcorn.  Throw it in a brown paper bag and shake it with a little vegetable salt
  • Rice crackers or rice cakes with toppings.  Separate the toppings from the crackers in the lunch tin so they don't get soggy.  
  • Mountain bread wraps with hommus and salad
  • Cut up carrot and celery sticks with mashed avocado dip. Chop up a few carrots and celery and store them in breathable containers in the fridge. Grab and go.
  • Salami sticks, chunks of cheese, water crackers and boiled eggs are staples too.  


Enjoy... and don't forget to add your ideas too.  

Leave a comment to let me know of your top lunchbox inclusions.